
How I set up my eSATA drive without an eSATA adapter card (Windows)
![]() In my last post I reviewed the external eSATA hard drive I bought recently, so now I will give you a guide for setting one up on the cheap side.
In my last post I reviewed the external eSATA hard drive I bought recently, so now I will give you a guide for setting one up on the cheap side.
My computer doesn’t come with an eSATA port, so I went cheap and bought an eSATA PCI bracket and a 3-feet eSATA cable. Of course I could have gone for an eSATA PCI adapter card, but I didn’t want to spend a ton of money just on the adapter card, in fact, I only spent about $10 for both.
The good thing about the eSATA bracket I got is that you don’t need to use both cables, you can unscrew one of them and use it for another project.
If your computer doesn’t come with an eSATA port:
If you want to go cheap (like me) you will need the following:
- eSATA PCI bracket
- eSATA cable
- One or more empty SATA slots
- One empty PCI slot/bracket

Before you do anything make sure you have one or more SATA slots available in your motherboard, if you’re not sure open the case, the slots look like this.
If you don’t have an empty PCI slot, then remove a card you are sure you don’t use. I removed my 56K modem, I haven’t had to use dial-up in years, so I don’t think I will miss it. Or you could drill a hole somewhere in the case to put up the port, it’s really up to you.
The installation is fairly simple, depending on what type of eSATA bracket you bought (single or double port like the one I got):
- Open up the case and connect the end of the cable bracket in an empty SATA slot, make sure they are secured and won’t disconnect when you move the case back to its place.
- Screw the PCI bracket in place.
Connecting the external drive for the first time
For this next part your computer can be on if you like.
- Turn on the external drive
- Connect one end of the eSATA cable to the drive’s eSATA port
- Connect the other end of the cable to the computer’s eSATA port
For the computer to see the drive for the first time you will have to:
- Check My Computer to see if it showed up already
- If not, go to Device Manager, right-click on the first icon and do “Scan for hardware changes”
- Check My Computer again
- If Device Manager didn’t find it, reboot
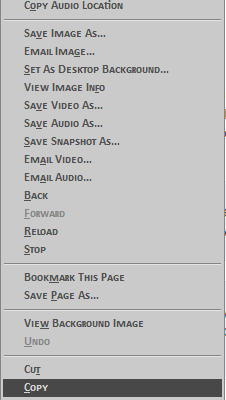
OR download a small program called HotSwap!.
It does the same thing as you can remove device from Device Manager but it provides much friendly user interface as you remove the removable device from the “Safely Remove Hardware” icon in the notification area. It also ensures that all data are written and flushed to the disk before the device to be hot-swapped, so you can use SATA/eSATA drive as a removable device much alike USB/IEEE1394 drive.
It displays a red version of the green “Safely Remove Hardware” icon. You can use it to discover/mount and unmount the drive whenever you want without the hassle of going through the many Windows settings.
To use it all you have to do is:
- Turn on the drive enclosure
- right-click the red icon
- Click on the very first option, “Scan for hardware changes”
Windows will tell you it found the drive and all.
If all fails then check the cables and make sure they are properly connected and secured, specially the cable bracket inside the case.
If all went well and your drive is accessible in My Computer
If you can access the drive you can now format it or use it in the file system it shipped.
If you can’t see the drive check the cables again.
Hot-swapping and/or turning off the eSATA drive
eSATA is supposed to support hot-plugging/swapping, so turning off the drive after making sure it finished whatever you had it doing should be fine, BUT hard drives don’t really behave like that, data corruption and loss are on the way.
So, if your computer came with an eSATA port, you used a PCI adapter card, or an eSATA to USB adapter you will probably be able to unmount the drive by using the “Safely Remove Hardware” icon in the Windows task bar, or HotSwap! if you installed it.
To disconnect the drive
- Stop the drive if available in the “Safely Remove Hardware” menu
- If not and you installed HotSwap! right-click the red icon and you will see “Safely hotswap ‘drive name’ – ‘drive letter'”
- It will tell you it’s OK to turn off
- Turn off the external drive
Make sure you know the drive letter of your external drive before trying to unmount the drive, specially if you have a recovery partition as all hard drives will be displayed in the HotSwap! menu.
A piece of advice, always, always, always make sure you remove any and all external storage devices properly or Windows will take a giant dump on your files and you’ll be sorry.
If you like/don’t like this guide please comment and let me know how I can improve it.


One Comment
Pingback:My review of the Fantom Drives GreenDrive Pro 2TB external hard drive | RETROhelix